Thursday, September 27, 2012
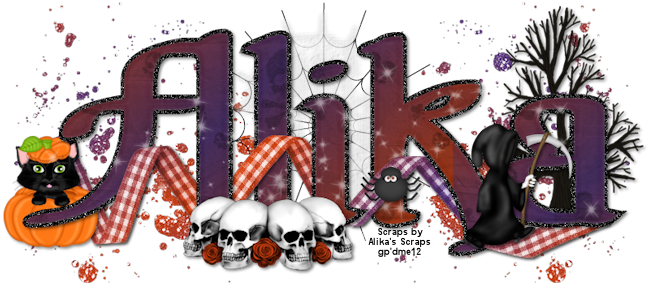
 Halloween Name FTU
Supplies:
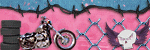
FTU Kit Halloween by Alika's Scraps available on her blog.
Font of choice. I used !The Black Bloc.
Let's Get Started:
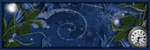
Open a new 800 width by 350 height.
Open paper03 in psp. Image> Resize to 75%. Minimize.
Click on new image.
Click in image with Text Tool and type the name you want. I used !The Black Bloc size 300 Bold. Click on foreground color. Select the Pattern tab. Under the pattern tab find paper 03 and select it. Hit okay and apply your text.
Right click over text. Align> Center in Canvas.
Duplicate.
Convert the TOP name layer to Raster.
Effects> PlugIns> EyeCandy5: Impact> Bevel: Basic- Bevel width 10.82, Bevel height 10, Smoothness 10, Round corners 0, Bevel Placement Inside Selection, Darken deep areas 0, Shade interior selected, Surface None; Lighting- Direction 135, Inclination 85, Highlight brightness 5, Highlight size 10, Highlight color white, Shadow color white; Bevel Profile- Button.
Select Duplicate layer. With Text Tool selected click on the name. Change the stroke to 10 and select color of choice. I used black.
Adjust> Add/Remove Noise> Add Noise: Gaussian 100 monochrome checked.
Effects> 3D Effects> Drop Shadow: vertical 2, horizontal 2, opacity 50, blur 5, color black.
Merge visible.
Paste as23. Image>Resize to 75%. Drag below the name layer. Position to the left. Duplicate. Image> Mirror.
Paste as21. Image>Resize to 35%. Drag to the top layer. Position at the bottom of the first 3 letters.
Drop shadow same settings.
Paste as17. Image>Resize to 85%. Drag behind the name layer. Position behind the left letter.
Drop shadow same settings.
Paste as16. Image>Resize to 65%. Drag above the name layer. Position to the right.
Drop shadow same settings.
Paste as15. Image>Resize to 65%. Drag behind the name layer. Position to the left.
Drop shadow same settings.
Paste as13. Drag above the name layer. Lower opacity to 50%.
Paste as12. Drag below the tree layer.
Drop shadow same settings.
Duplicate. Drag above the sparkle layer. Erase the part over the kitten, right side of first letter, and alternate erasing parts over the other letters as desired.
Paste as06. Drag under bottom ribbon layer.
Paste as03. Image>Resize to 25%. Image>Flip. Drag to the top layer. Position on letter to the right of the web.
Drop shadow same settings.
Merge visible.
Image>Resize to 650 width by 284 height.
Add copyright or credits.
Merge visible.
Save as PNG.

Subscribe to:
Post Comments (Atom)
TWI

Sunshine Daze Topsite
Vote Please

Fan Of


About Me

- SuthrnPrincess
- I am a mom of 5 rambunctious and audacious kids. 1 girl and 4 boys. I started out tagging and fell in love with my PSP. I am with the most wonderful man in my world, George. If you make something with a mask or template I would love to see it. Please feel free to email me at georges_princess@yahoo.com. If you make a tutorial please link back to my blog for supplies do not include my materials nor link to my file share site. I would love to put your tutorial link on my blog so please feel free to email me :).
My Blinkies


CT For


0 comments:
Post a Comment